
Ever wondered if the right lighting stand can transform your aquarium? A stylish stand not only supports your lights but adds a touch of charm that makes your tank feel like a peaceful underwater haven.
In this guide, we explore both ready-made kits like the GFW-LIGHT-LT1 and fun DIY projects using conduit pipes. Each option offers its own rewards, from easy, breezy assembly to a burst of creative freedom that makes your aquarium uniquely yours.
So, why not dive in and see how you can brighten your tank while keeping it neat and playful for you and your fish?
Aquarium Lighting Stand: Shine in Style
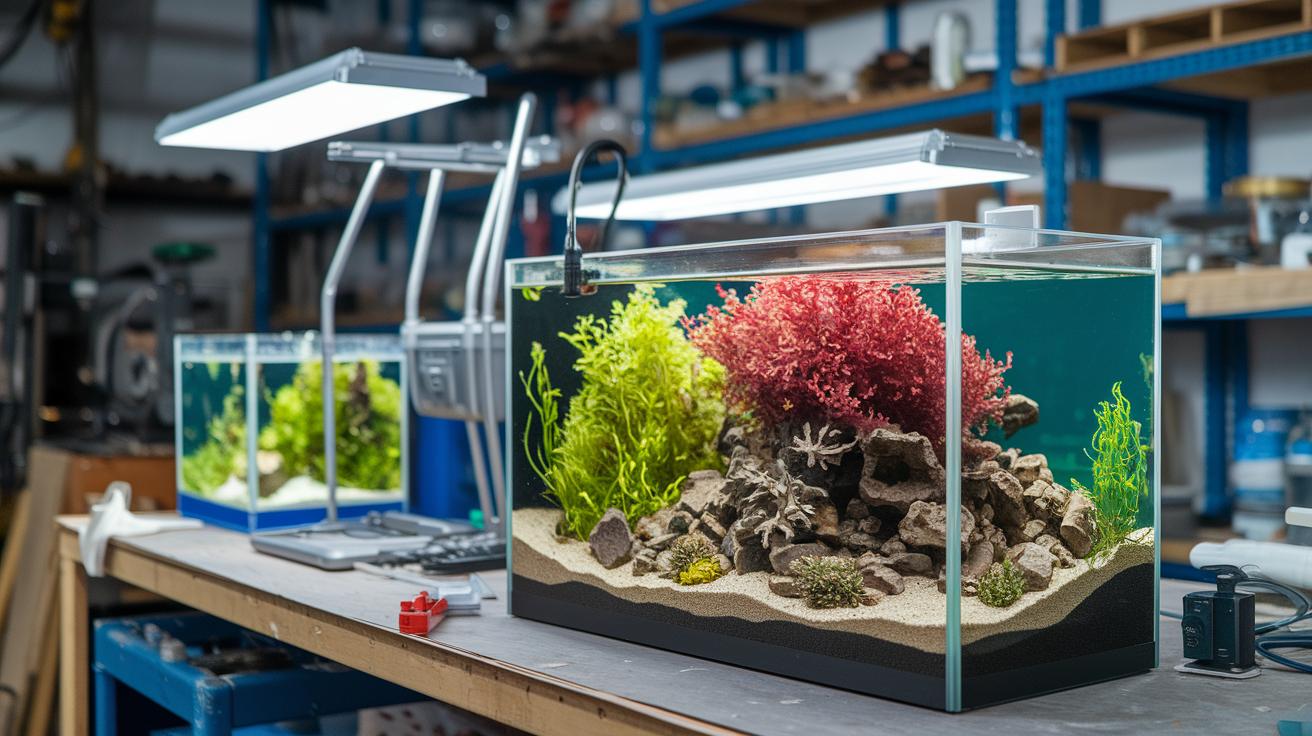
When it comes to setting up your aquarium, you can choose from ready-made commercial kits like the GFW-LIGHT-LT1 or the UNS x ONF stand kit. These options have predrilled brackets and neat fittings that let you put your stand together quickly and with ease, perfect for anyone who prefers a fuss-free approach.
On the other hand, DIY frames such as those crafted from conduit pipes offer a unique appeal. They let you design a stand that perfectly matches the width of your tank. But be warned, the narrow space between glass and wood, often with less than ½ inch clearance, and the need to cut the conduit exactly right can make the project a bit challenging. Some fish lovers even experiment with FRP or use acrylic props to lift fixtures without building a full stand, all depending on their setup and how crafty they feel.
| Product | Material | Weight Capacity | Compatibility | Price Range | Adjustability |
|---|---|---|---|---|---|
| GFW-LIGHT-LT1 | Aluminum | High | Excellent with various LED units | $50–$75 | Limited by pre-set design |
| UNS x ONF stand kit | Matching silver-finished metal | Designed to support its specific LED unit | Tailored for the Flat Nano Desktop LED | Moderate | Minimal customization needed |
| Conduit Pipe Frame | Galvanized conduit | Moderate (depends on fastener strength) | Versatile DIY option | Budget-friendly, under $30 | High with custom measurements |
| FRP option | Fiberglass reinforced plastic | Reliable with proper installation | Better in open clearances | Varies | Less flexible in narrow gaps |
| Acrylic Props | 1/4″ thick acrylic | Best for lighter fixtures | Useful for minor height lifts | Inexpensive | Offers incremental height changes |
In the end, pick the stand that fits your tank’s size and your budget. Make sure it matches the look you want and that it’s easy to install, so your aquarium can shine in style like the gentle glow of light dancing on water.
Key Features to Evaluate in a Tank Lamp Elevating Platform
When you’re picking an elevated platform for your tank lamp, it’s not just about making your aquarium look cool, it also means you’re setting up a strong base for your lights, water flow, and even plant growth. Think of the platform as the friendly bridge that connects great performance with a beautiful underwater scene.
-
Dimensional Fit
Make sure the platform fits your tank’s width exactly. For instance, if you’re using a conduit pipe setup, precise measurements help avoid gaps that might make it unstable. -
Height Adjustability
Being able to change the height of your platform means you can adjust how the light spreads across your tank. A platform with adjustable slots lets you fine-tune the lamp’s position as your aquarium grows and changes. -
Material Resilience
Choose tough materials like FRP, which resists corrosion and stays strong even in wet environments. If you have tight spaces, like between glass and wood, a 1/4-inch thick acrylic LED prop can be a solid choice, it boosts light distribution while keeping its strength. -
Maintenance Access
Easy access for cleaning or quick adjustments is a huge plus. A design that comes apart easily makes long-term upkeep a breeze, so you spend less time worrying and more time enjoying your aquatic world.
Mixing these features into your design turns the platform into a key part of your tank’s overall vibe, supporting your lights and making daily care simpler. Ever notice how a well-planned aquarium feels like a mini slice of calm in your busy day? That's the magic of a smart setup.
Material Durability and Stability Considerations for Aquarium Lighting Stands
Choosing the right stand for your aquarium lights is much like finding the perfect rock for your fish tank, it has to be sturdy and cared for properly. Materials such as aluminum, galvanized conduit, and acrylic props are popular because they combine strength with a clear, neat look. Still, even the toughest materials can feel the effects of damp air and water splashes.
Let’s break down some easy tips on how to care for these materials so your tank setup stays strong:
-
Aluminum Trusses: These are given a special treatment called anodizing, which helps them resist bending and keeps their finish even in humid spots. The trade-off? They cost a bit more. A good routine is to check your aluminum unit every six months, kind of like giving your favorite bike a quick once-over.
-
Galvanized Conduit Pipes: These come with a rust-proof coating that makes them both tough and friendly on your wallet. Over time, however, this coating might start peeling off, so it’s wise to inspect and refresh the coating every year.
-
Acrylic Props: For the best support with LED setups, use acrylic that’s at least 1/4 inch thick. They provide clear, robust backing, but if you overload them, they might crack. Checking for stress signs every six months can help keep them safe.
Taking a few minutes for routine checks helps ensure your materials hold up and keeps your aquatic home running smoothly.
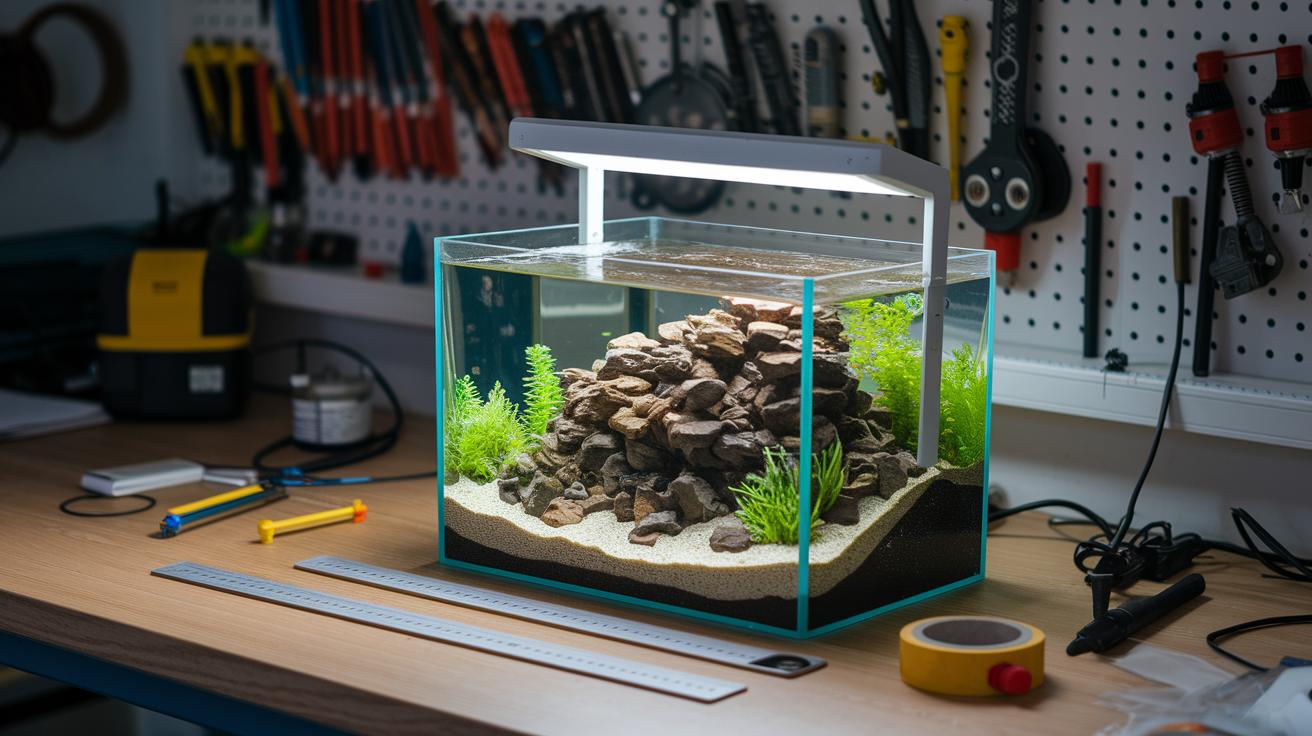
Step-by-Step Installation Guide for Your Aquarium Lighting Stand

Start off by gathering all your tools and checking the space where your aquarium stand will live. Think of it like preparing your little underwater haven! Grab a tape measure, a saw, and sturdy fasteners. If you're working with conduit pipes or a commercial kit with predrilled brackets and adjustable slots, be sure to measure the gap between the glass and the wood, this will save you any surprises later.
-
Measuring
Begin by carefully measuring the space between your aquarium glass and any nearby wood. Accurate measurements are key, just like making sure every fish has enough room to swim. -
Cutting/Selecting Parts
Use your measurements to cut your conduit pipes or to pick the perfect parts for your setup. This is the foundation of your custom stand that will support your lighting, think of it as setting up the coral base for your aquatic display. -
Attaching Frames or Brackets
Secure the frame or predrilled brackets with fasteners rated for both the stand and the weight of the fixture. A solid attachment is like building a sturdy reef that holds everything together. -
Leveling
Now, check your assembled stand with a level tool. A level base keeps everything balanced like a calm seabed, ensuring that your setup stays steady no matter what. -
Mounting the Light
Next, attach your aquarium light to the stand, making sure it’s tight and secure. Follow your design carefully, it's like placing a shimmering piece of treasure right where it belongs in your underwater garden. -
Stability Testing
Finally, gently test the entire structure by applying slight pressure. This step is like a soft wave checking if every part of your setup is firmly in place.
Tip: A tiny measurement error can lead to a shaky structure, so double-check each measurement and fastener. Your careful work ensures a lasting, secure setup that you and your aquatic friends can enjoy.
Comparing Top-Rated Support Systems for Aquarium Lights
We've blended this review with our earlier analysis, covering both ready-made kits and DIY projects. We've also updated the pricing and shared recent user tips. For instance, the GFW-LIGHT-LT1 now costs between $50 and $75 and is built with a secure, rust-proof design. On the DIY side, users mentioned that makeshift conduit pipe frames, which run about $25, need careful measuring to work well.
One aquarist recently said, "Fixing my acrylic LED props, which cost around $15, was as simple as putting together a puzzle, even though they don’t offer much height."
For more details on the good points, the not-so-good points, and how easy each option is to use, please check the updated tables above.
DIY vs. Commercial Aquarium Lighting Stand Solutions
If you're a fan of hands-on projects, making your own aquarium lighting stand can be a fun and pocket-friendly adventure. You might only spend about $30 on parts, and you get the joy of customizing every little detail. Just be sure to take careful measurements, so you don't end up with a stand that's too short or too tall for your tank.
On the other hand, commercial kits like the GFW-LIGHT-LT1 kick off at around $50. These ready-to-go options come with prebuilt fasteners and easy-to-follow instructions, which means you can set up your aquarium faster and spend more time watching your fish glide gracefully.
- Expense: DIY stands come with lower parts costs, while commercial kits need a bit more money upfront.
- Build Time: When you build it yourself, you spend extra time measuring and cutting; commercial kits are designed for speedy assembly.
- Appearance: DIY projects let you add a personal and unique touch, whereas store-bought products have a clean, uniform look.
- Installation: Homemade structures need careful measuring to ensure safe clearance, while commercial options make the process much simpler.
- Customization: DIY lets you tweak the design as you wish, but commercial kits stick with one fixed design.
So, if you're excited by the idea of rolling up your sleeves and adding your personal touch, a DIY project might be just what you need. But if you’d rather get everything set up quickly and start enjoying the peaceful flow of your aquarium right away, a commercial kit is a smart, reliable choice.
Pricing, User Experiences, and Final Buying Tips for Aquarium Lighting Stands

Online chats among aquarists reveal that many appreciate the simplicity of kits that install without the need for extra tools. Some friends opt to tweak the brackets slightly for a sturdier DIY build, while a few remind us to double-check the fit when space is tight around the tank.
- Price: DIY versions usually run under $25, but the commercial kits tend to start around $50.
- User Views: Even with predrilled kits, a few small bracket adjustments might be needed to get everything to sit just right.
- Assembly Notes: A common tip is to ensure there's plenty of space between tank parts so nothing feels crammed.
- Buying Advice: Check both local and online specialty stores to discover models that suit your budget and setup.
Tip examples:
- Always measure your tank's gaps to avoid a poor fit. One aquarist shared, "I measured my tank twice before picking a kit, which saved me a lot of hassle later."
- Decide whether you feel more at ease with tinkering on your own through DIY assembly or going for a ready-made solution.
- Trust and lean on live user feedback, it offers genuine insight into how these stands perform over time.
Final Words
In the action, we explored both DIY ideas and ready-made kits that keep your tank looking great. We talked about material, fit, and the easy steps needed for a solid setup. Short lists helped compare prices, build ease, and style differences to guide your choice.
Taking these tips to heart will help you pick the perfect aquarium lighting stand for your tank and budget. Enjoy building a bright, welcoming underwater world for your aquatic friends.
FAQ
What is the best aquarium lighting stand?
The best aquarium lighting stand gives secure support, long-lasting quality, and a pleasing look. It can be a commercial kit or a well-crafted DIY frame, matching your tank size and budget needs.
How can I build a DIY aquarium lighting stand?
The DIY approach to an aquarium lighting stand involves measuring clearances, cutting conduit pipes, and assembling a sturdy frame. Following precise steps yields a reliable, custom support for your lighting fixture.
Where can I purchase an aquarium lighting stand?
You can find an aquarium lighting stand on popular online stores like Amazon, local aquatic shops, or specialty retailers. These sources offer ready-made stands or parts if you prefer building your own.
Do fish prefer blue or white light?
The question about fish light preferences reveals that many fish thrive under blue light, which mimics natural underwater hues, while white light offers a balanced brightness ideal for plant growth and clear viewing.
What is the best place to position the light in an aquarium?
The ideal spot for aquarium light placement is directly above your tank, centered to provide even coverage across the water surface, ensuring all aquatic life receives balanced illumination.
Should aquarium lights be left on all the time?
The answer to continuous lighting is that aquarium lights should follow a natural day-night cycle. Using a timer to mimic sunrise and sunset helps promote healthy fish behavior and plant growth.