
Have you ever thought about whether your fish pick up on the stress of cloudy water? Fresh water might be the secret to keeping them calm and happy. This guide walks you through an easy checklist for safe aquarium water changes.
Start by gently disconnecting your gear and removing any floating debris with a simple vacuum, sort of like tidying up after a little pool party. Next, refill your tank with water that’s been treated to keep it safe for your fish, making sure not to upset the balance of their underwater world.
These easy steps go a long way in making your fish’s home a cozy, sparkling haven. Give it a try and see how a little extra care can make a big difference!
Quick Step-by-Step Checklist for Aquarium Water Changes
First things first, unplug your heater, filter, and lights so nothing funny happens with the electricity. Then, use a gravel vacuum to remove about 25% of the water, or even up to 75% if your tank is in rough shape. When you use the vacuum, lower the nozzle about an inch into the gravel to sweep up all that debris and waste.
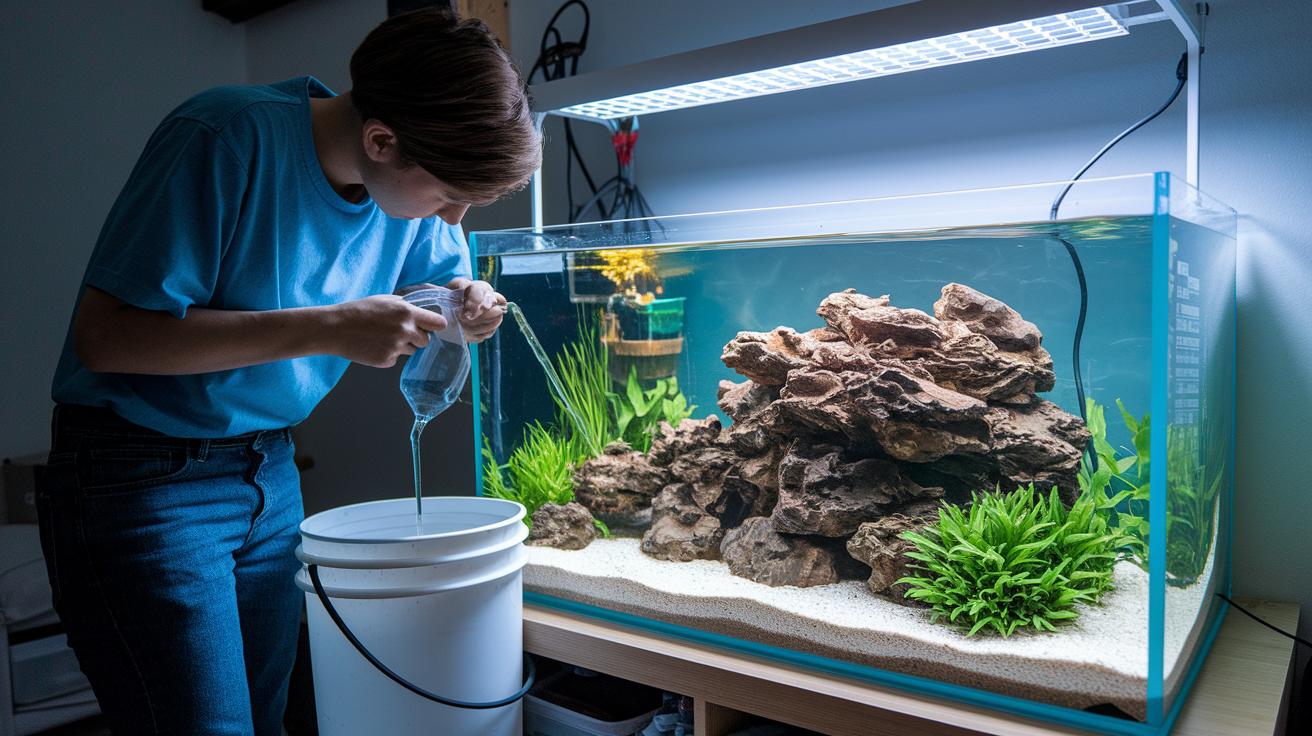
Next, siphon out between one-third and one-half of the tank water. To keep your setup neat and avoid splashes, secure the hose in a bucket with a rock or a small decoration. Doing this helps clear out unwanted nutrients and waste that could encourage algae to grow.
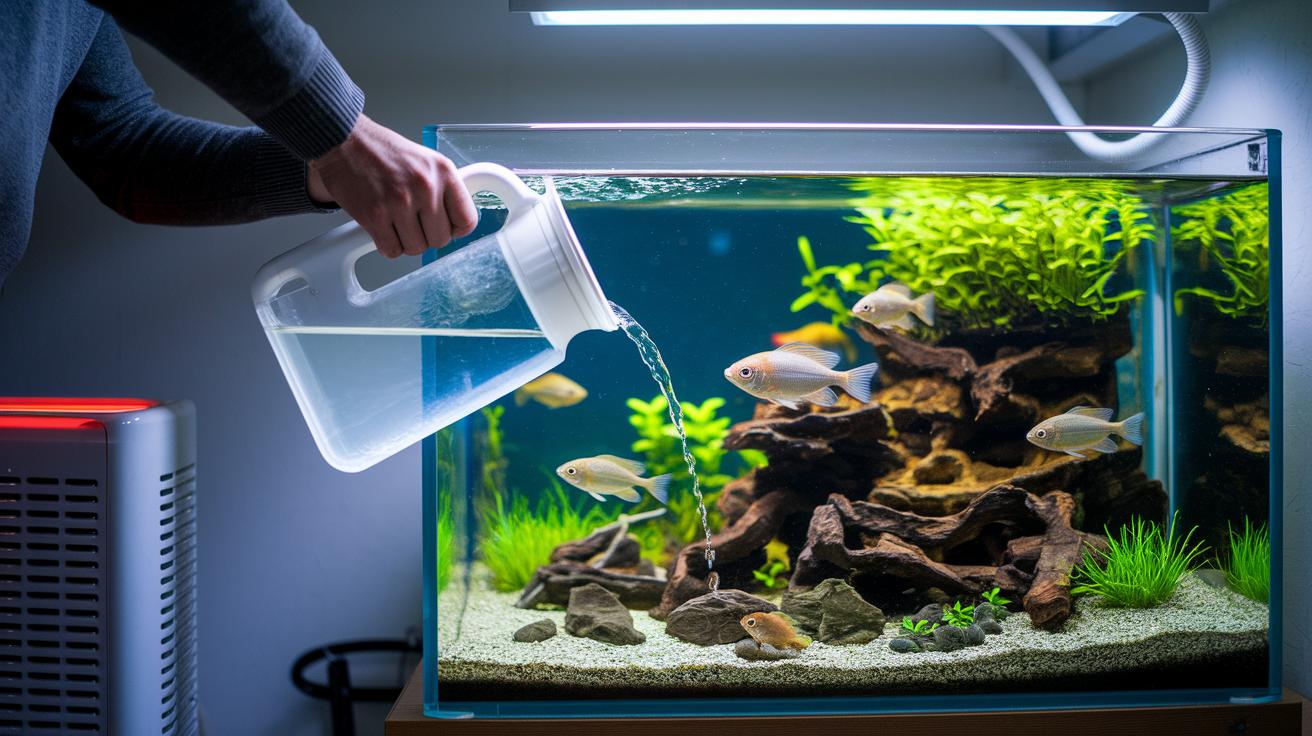
After you've drained the tank, get some fresh tap water ready. Treat it with a dechlorinator to remove any harmful chemicals and ensure it holds the good trace minerals your fish and plants need. Check the temperature with a thermometer to make sure the new water is within 5°F of the tank's water. This keeps your aquatic pals stress-free. Slowly pour the fresh water back so you don’t disturb your tank’s decor.
Finally, test the water’s pH and adjust if needed. This little extra check helps wrap up your cleaning routine and keeps your underwater world healthy.
Aquarium Water Changes Checklist: Gathering Tools & Safety Precautions

When it’s time to refresh your tank, choose the right tools to keep everything calm and clear. Here’s a friendly list to guide you:
- Gravel Vacuum or Siphon: Use a siphon to gently remove water while keeping your gravel undisturbed. Place the hose slowly so that it doesn’t stir up any debris.
- Bucket: Secure your bucket with a rock or a piece of decor so it stays steady and prevents spills. This little trick helps catch all the runoff safely.
- Algae Pad: Grab an algae pad to give your tank walls a gentle scrub. A firm, even swipe clears away unwanted buildup and makes everything sparkle.
- Decor Cleaner: Use a safe, effective cleaner on your tank ornaments to brighten up their look. Clean each piece with care to keep your aquarium vibrant.
- Water Conditioner: Add a measured dose of Seachem Prime or Nutrafin Cycle to treat your new water. This conditioning helps make the water safe and cozy for your fish.
- Test Kit and Thermometer: Check the water quality and temperature with a reliable test kit and thermometer. Testing regularly ensures a healthy environment for your aquatic friends.
Aquarium Water Changes Checklist: Preparing & Conditioning New Water
Start by carefully measuring the amount of water you need. Say your tank holds 40 gallons and you're doing a 25% water change, you'll need exactly 10 gallons of fresh water.
Next, treat your tap water with a dechlorinator like Aqua Plus or Seachem Prime. This simple step gets rid of chlorine and chloramine so it's safe for your fish. (Remember, if you’re using RO or distilled water, you must add minerals to keep things balanced.)
Then, grab a thermometer and make sure the new water is close to your tank’s temperature. For example, if your tank is at 78°F, the fresh water should range between 73°F and 83°F. This helps keep your fish comfortable.
Finally, stir the treated water well before slowly adding it back to the tank. For more tips on fine-tuning your tank’s water, check out How to Balance Fish Tank Chemistry During Maintenance.
Aquarium Water Changes Checklist: Draining, Cleaning & Debris Removal
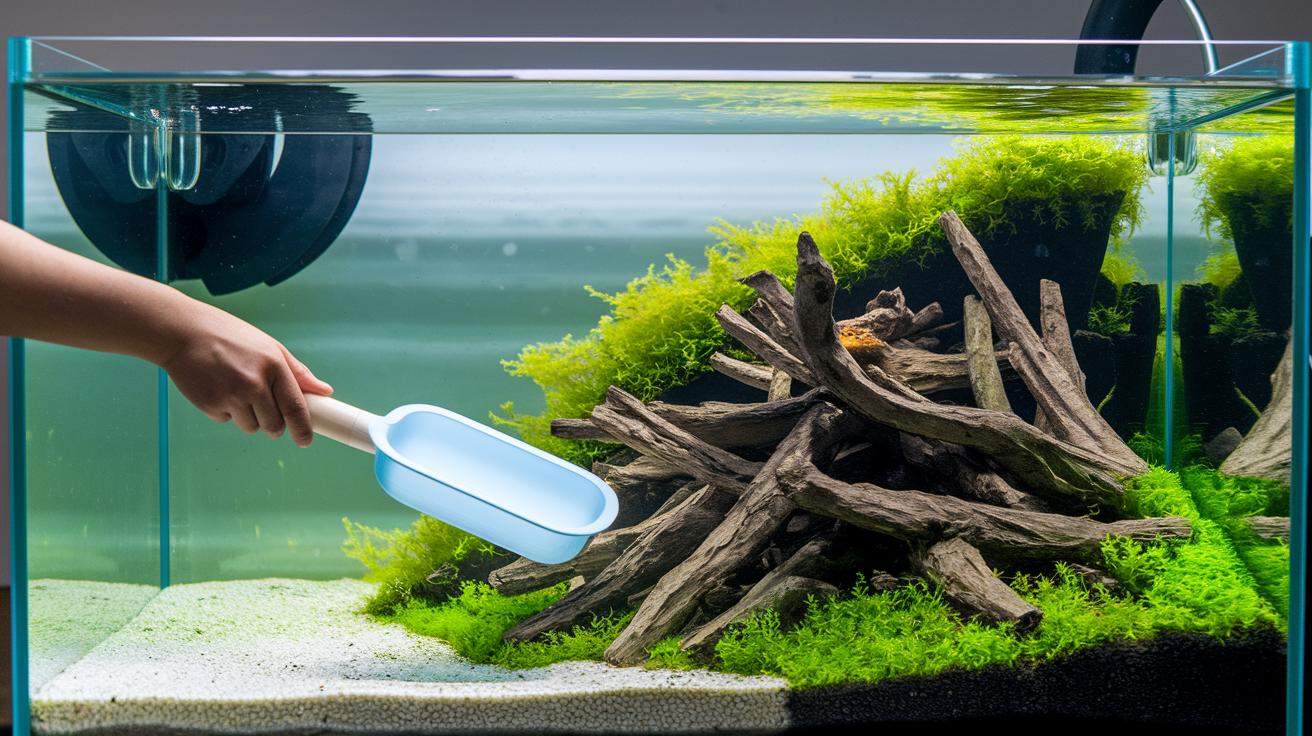
If your tank is still settling in during its first 4-6 weeks, try using a soft scoop to gently remove some water instead of using a gravel vacuum. Think of it like stirring a delicate drink, you’re mixing the water without kicking up too many good bacteria.
When it comes to removing tough algae, just flip your décor. Imagine turning a page in your favorite book as you gently clear away the algae that’s had time to build up.
Next, take a peek at your safety and checklist guides for tips on unplugging gadgets, working with the gravel vacuum, and making sure your hose is set up so there’s no crazy splashing.
Aquarium Water Changes Checklist: Refilling Tank & Re-establishing Conditions
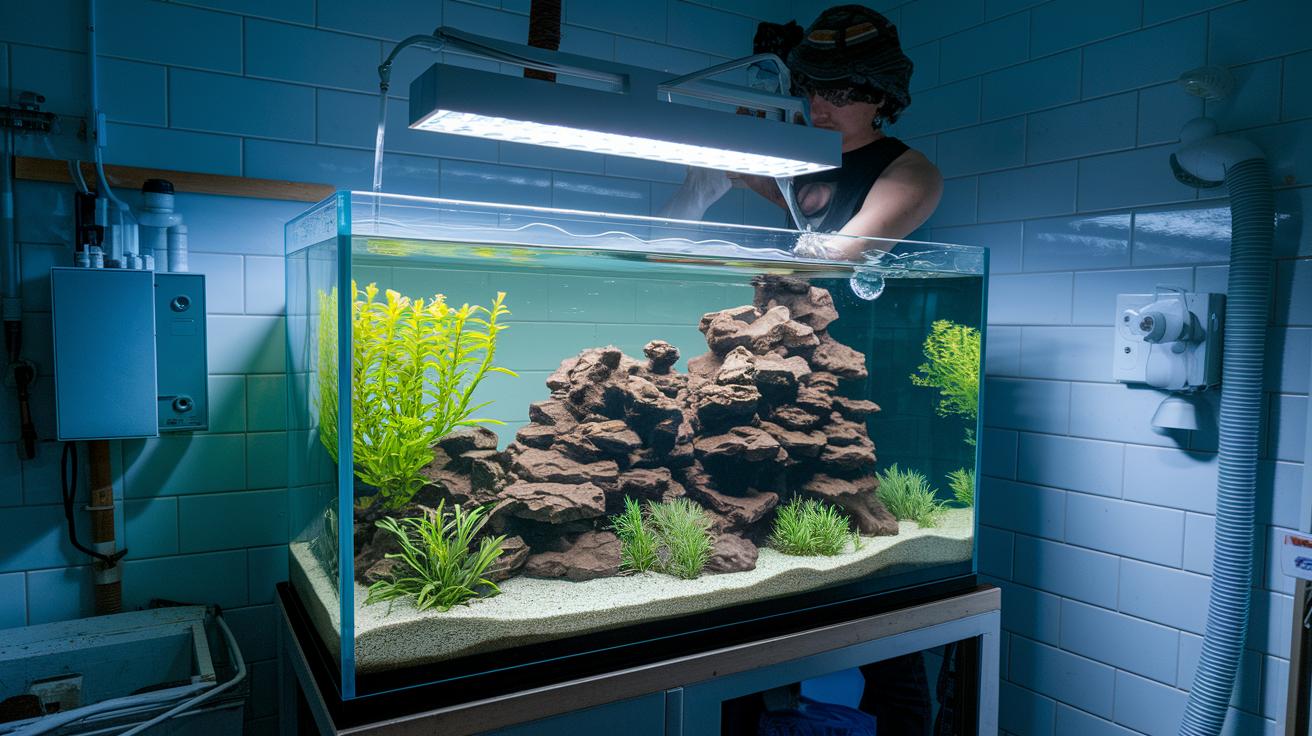
Start by slowly pouring in water that’s been treated and warmed to match your tank's temperature. Think of it like gently adding a cool drink to a clear glass, carefully preserving the neat layout you’ve created.
After the tank is full, add the correct dose of water conditioner as directed on the bottle. It’s similar to following a simple recipe, each ingredient works together to keep your water balanced and safe for your fish.
Next, check that the water level sits nicely above the heater’s minimum mark. This step keeps your heater from running dry. Then, restart your filter and heater, and take a moment to listen for the gentle hum of your tank working properly.
If you care for special types of fish like cichlids or discus, you might want to use a conditioner made just for them. This extra care helps build a home that’s perfectly suited for your aquatic friends.
Aquarium Water Changes Checklist: Post-Change Testing & Maintenance Schedule

After you top off your tank, take a moment to check the water quality so your fish feel at home. Use your test kit to measure pH, ammonia, nitrite, and nitrate levels. These numbers give you an idea if your water is balanced or if you need to make small changes. For instance, if the pH is too low, you can add a mild base until everything feels just right. Testing early helps catch any hidden issues that might upset your aquatic pals or let unwanted algae sneak in.
Next, think about setting up a routine testing schedule. Here are some simple steps to follow:
- Test your water right after a change.
- Jot down the readings for pH, ammonia, nitrite, and nitrate along with the date in a log. This record will be your guide over time.
- Keep an eye on any shifts in these numbers that could signal changes in your tank’s environment.
- Adjust the pH when needed, keeping in mind that different types of fish might need slightly different settings.
If your tank is lightly stocked, aim for weekly changes. For tanks with lots of plants, every two weeks might work better. Sticking to a regular schedule helps keep the water balanced and prevents harmful levels from spiking up.
Regular testing not only keeps your water safe for your fish but also lets you notice small changes before they become big problems. With a steady log and routine checks, you'll be well on your way to maintaining a healthy, peaceful aquarium. For more details about scheduling and monitoring, take a look at the Maintenance Checklist for Aquarium Water Quality.
Final Words
In the action, our post walked through every step you need for a clean water change, from gathering proper tools and prepping water and equipment to draining, cleaning, and refilling the tank. We also covered why testing water quality is key for a healthy setup.
This step-by-step checklist for aquarium water changes helps keep your underwater world calm, clear, and inviting. Your aquatic friends are sure to thrive with every careful, routine step you take. Enjoy a vibrant aquatic home!
FAQ
How do I perform a partial water change in my fish tank, such as a 25% change?
The method for a partial water change involves using a gravel vacuum to remove about 25% of the water, then refilling with dechlorinated, temperature-matched water to maintain stable conditions.
How do I change the water in my fish tank safely, especially when using a filter?
The approach for safely changing your fish tank water with a filter is to unplug all equipment, gently remove a portion of the water to avoid shocking the fish, and slowly refill with conditioned, similar-temperature water.
How can I change my fish tank water if I don’t have a siphon?
The method for changing water without a siphon is to use a cup or small container to remove water carefully, though a siphon is recommended for an easier and more thorough clean.
How often should I change the water in my tank or new aquarium?
The schedule for water changes depends on tank setup; typically, tanks with filters benefit from weekly to biweekly partial changes, and new aquariums should follow a similar routine while monitoring water quality.
How do I change the water in my goldfish tank effectively?
The process for changing water in a goldfish tank includes weekly partial water changes to reduce waste buildup, using a gentle siphon and conditioning new water to protect your goldfish’s sensitive environment.
What tools make up a complete aquarium water change kit?
The components of an aquarium water change kit are a gravel vacuum, bucket, algae pad, water conditioner, test kit, and thermometer, all essential for safely performing a water change.
How can beginners safely change their aquarium water?
The method for beginner water changes involves slowly removing a portion of the water, treating tap water with a conditioner, and testing water parameters after refilling to keep fish healthy and stress-free.
Should I ever perform a 100% water change in my aquarium?
The practice of doing a 100% water change is generally discouraged, as it can disrupt the beneficial bacteria and shock your fish, so partial changes are recommended for maintaining a balanced environment.